
Introduction
The video above is a time-lapse video of figure generation with a 3D printer.
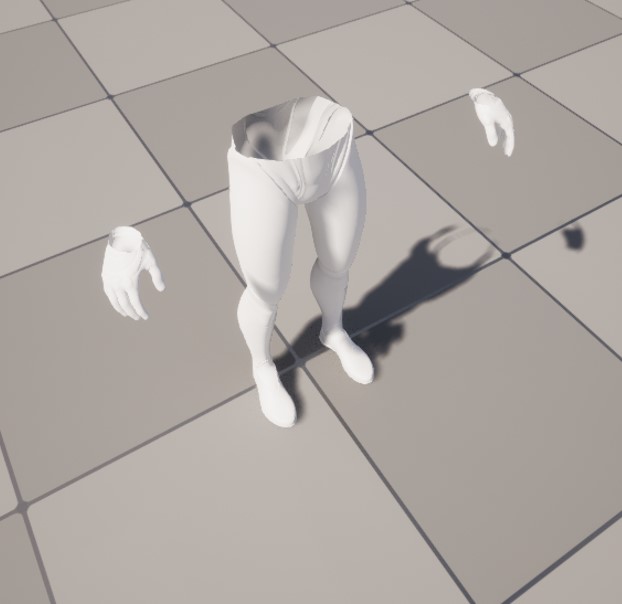
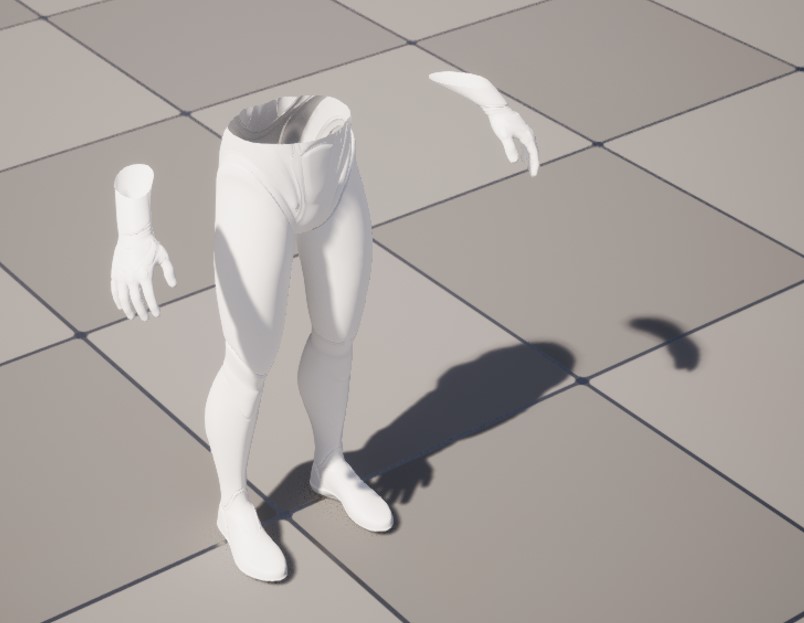
If you are trying to do this kind of expression in CG, you will notice that you need to fill in the inner cavity of the Mesh. In this article, I will introduce one easy way to do that! (There are some limitations that I will mention along the way…)
I also provide sample data below that implements what I describe here, so if you want actual working data right away, please check it out (it also includes the extra implementation data listed at the end oft this article).
https://heyyohanashima.gumroad.com/l/nlujvf
Version
Unreal Engine 5.2.0
Method
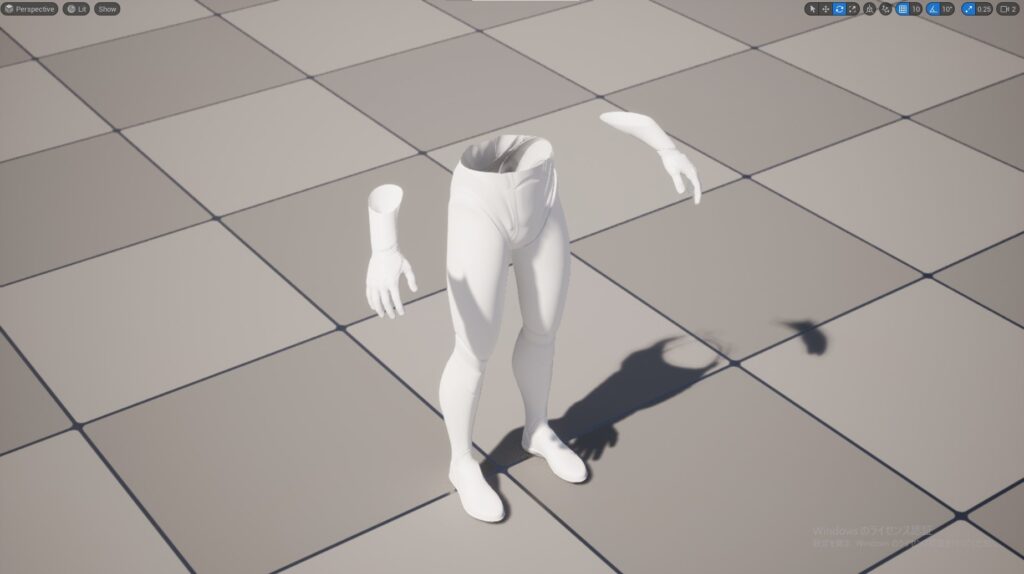
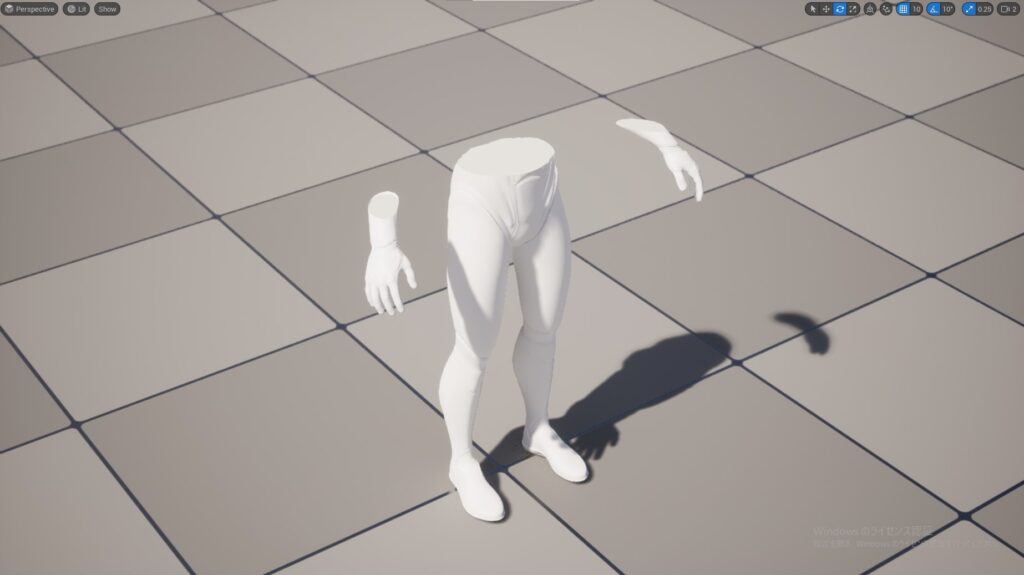
In conclusion, I place a plane mesh on the cross-section of the mesh and make it visible only the part where the back side of the mesh can be seen on screen.
Implementation
- Set up Mesh and Stencil Value
- Use Stencil Value to make the plane mesh transparent with material
- Limitations
1. Set up Mesh and Stencil Value
First, to make it easier to work with, I set up meshes in BP Actor.
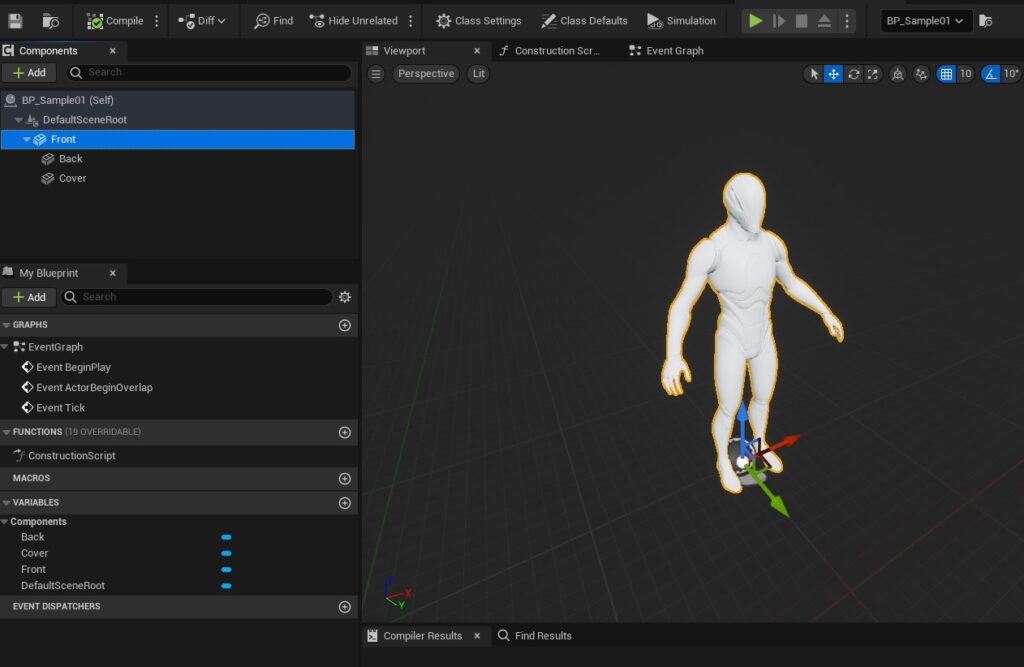
- Front: Mesh for drawing only the front of the target mesh (assign a Two Sided Off material)
- Back: Mesh for drawing the back side of the target mesh (assign Two Sided On material)
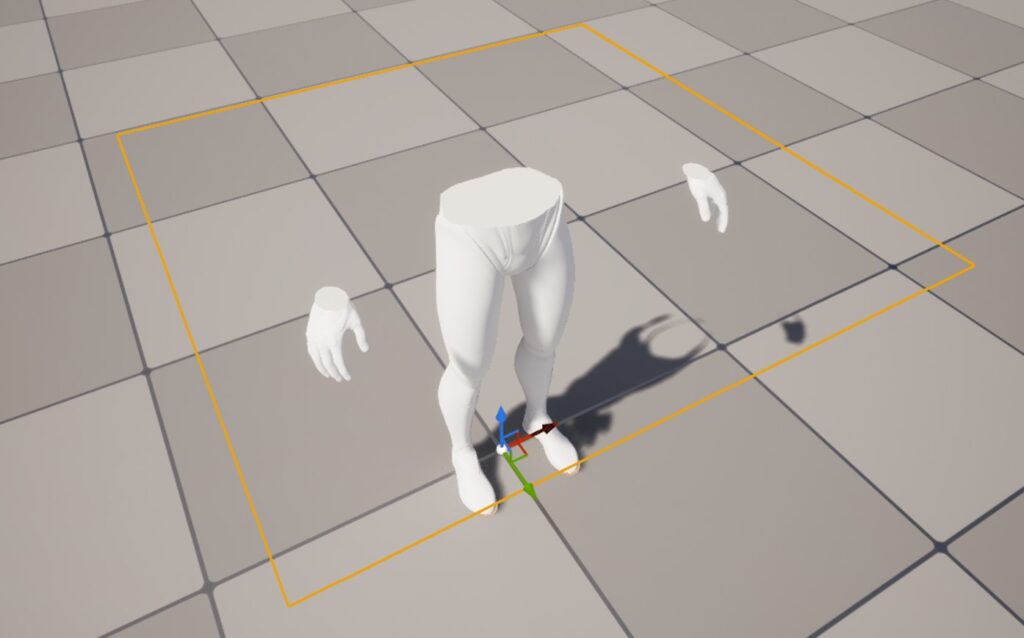
- Cover: Plane mesh that fills the inside of the target mesh to look visible
Then, set the Stancil Value to the Back mesh. As shown below, turn on Render CustomDepth Pass and set CustomDepth Stencil Value to any value you like (2 in this case). This value will later be used in the material of the Cover mesh.
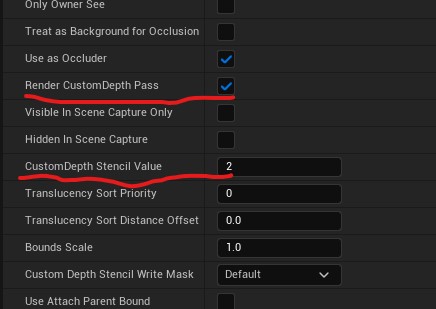
Also, for the Front mesh, turn on Render CustomDepth Pass.
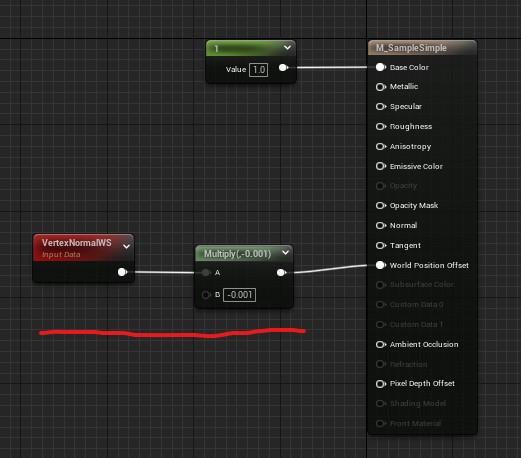
And shrink the Back mesh slightly in the Normal direction so that the front side is slightly inside (=not visible to the camera) of the Front mesh (do not use TwoSidedSign to display only the back side, as it would not be correct to draw the shadow described later).
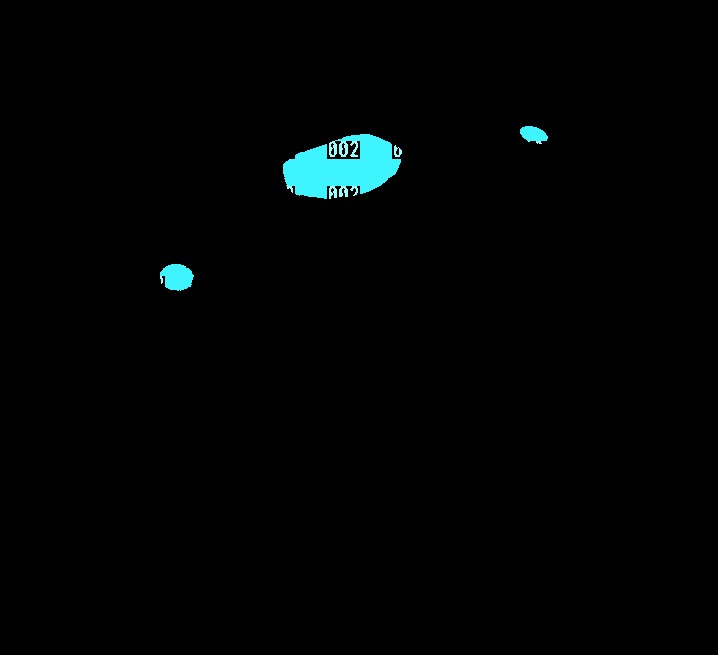
Now, the Stencil Value (2) is written to the Stencil Buffer only where the back side of the target mesh is displayed.
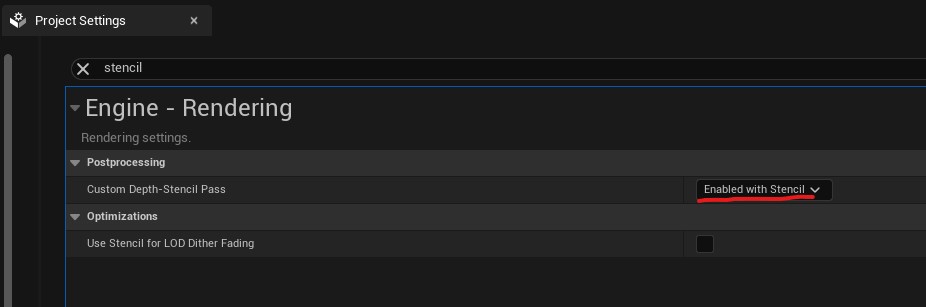
Note that Custom Depth-Stencil Pass in Project Settings>Rendering>PostProcessing must be changed to Enabled with Stencil if Custom Stencil is to be used.
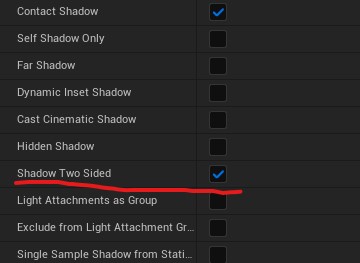
By default, the back side of the Mesh does not cast a shadow, so check the Back mesh’s Shadow Two Sided checkbox to ensure that the shadow is cast correctly.
2. Use Stencil Value to make the plane mesh transparent with Material.
Next, use this Stencil Value as a mask so that only the part of the Cover mesh that covers the back side of the target mesh is visible.
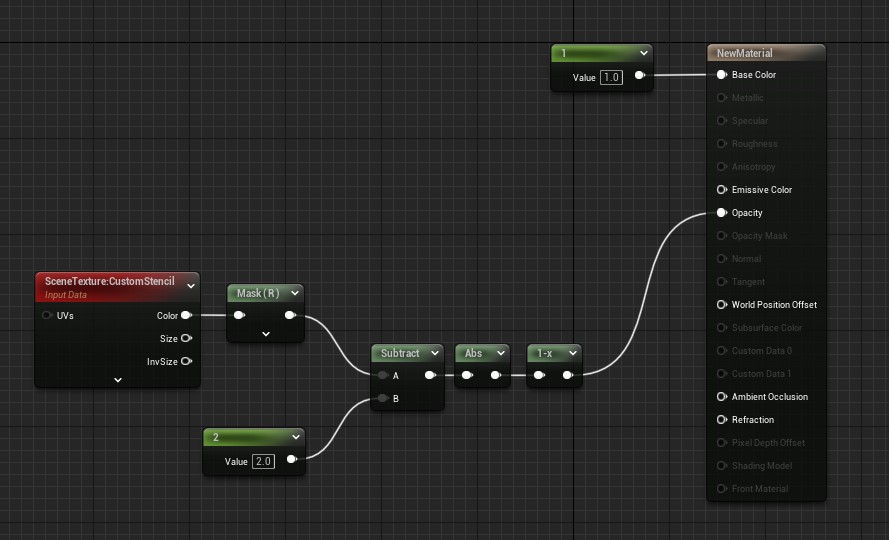
The process itself is very simple. If it matches the Stencil Value set in the Back mesh(2 in this case), opacity will be set to 1; otherwise, set to 0 or less.
Now that the Cover is drawn just on the back side of the target mesh, a simple expression that fills the cavity is accomplished.
3. Limitations
Although it is relatively easy to express the filling of cavities, there are some aspects that are difficult to adjust well, and there are two major limitations.
① Only translucent can be used for the plane mesh to fill cavities.
Stencil Value (GBuffer) can only be obtained from the material in the order of drawing below translucent, so if you use this method, the plane mesh on a cross-section will be translucent.
With translucent material, it is difficult to get the right texture because the processing around lighting is different from that of opaque.
One way around this is to use SceneCapture2D. If the tuning is done well, even if SceneCapture2D is used, it could be good performance to some extent in this case, so it may be a way to go.
② Failure if there is a penetration in the target mesh
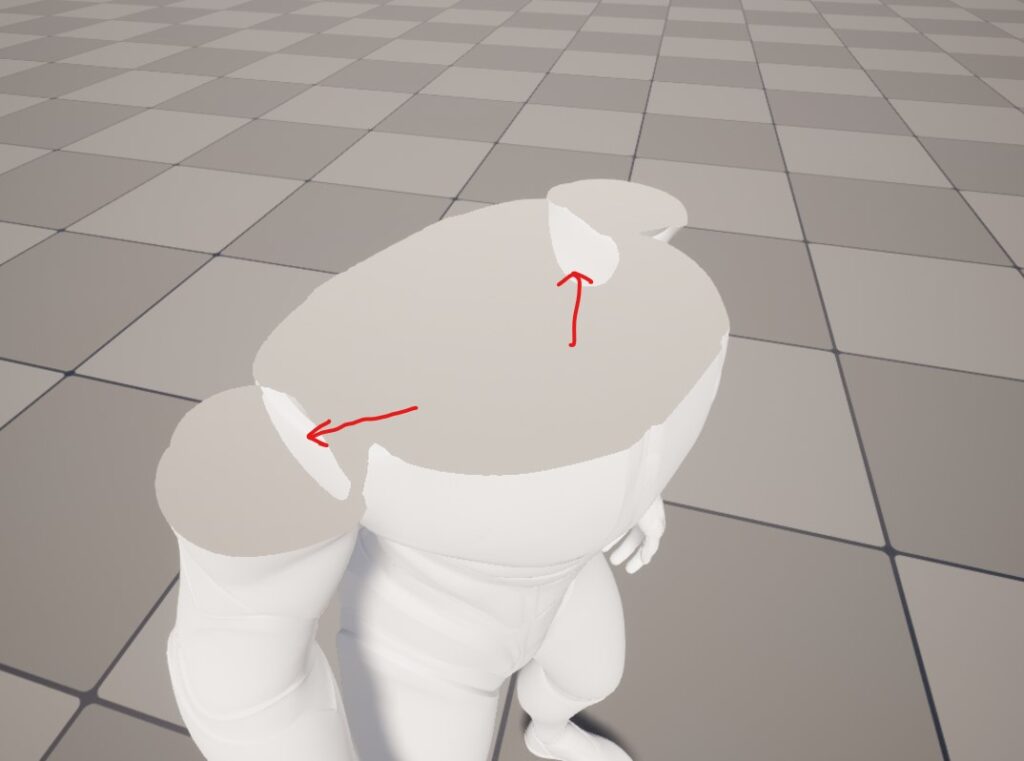
If the Mesh has a through-penetrating part, the surface Mesh will be inside the Mesh, and the Stencil Value will not be written to that part and the plane mesh will not be drawn, which will cause a breakdown in the representation of filling the cavity.
Currently, I can’t think of much of a workaround for this, so I think it would be difficult to use this method for mesh with Animation.
Bonus
The problem of the filled area becoming translucent can be avoided by using SceneCapture2D.
Below is an example of using SceneCpature2D to assign an opaque material to the plane mesh that fills the cavity and add Normal.
https://www.tumblr.com/yooo19/721932894110679040/3d-print-like-model-forming-effect-opaque-normal
I also tried to make it possible to adjust the orientation freely as shown below.
https://www.tumblr.com/yooo19/721627445301739520/3d-print-like-model-forming-effect
The data provided below include those described above, plus an extra one using SceneCapture2D and adjustable orientation, so if you are interested in the implementation, please take a look!
https://heyyohanashima.gumroad.com/l/nlujvf


