
In the “Content Examples” project distributed by Epic Games, which is a collection of samples of various Unreal Engine features, there is a Map called Niagara Advanced in UE4.26. (There is in UE5 also!)
There, many very informative samples of Niagara’s new features and applications using them are placed, and you can learn a lot by looking at the implementation details.
I will break down those samples into several articles.

By the way, you can download the samples by function from the Learning tab of the Epic Games Launcher. Also note that the contents can be different for each version of UE.
TLDR;)
- Since 4.26, Niagara can retrieve the information written in the GBuffer!
- By comparing the actual position with the calculated position based on SceneDepth, you can adjust for unintended particles.
Introduction
This article explains Sample GBuffer Attributes, a new feature added in 4.26.
Using this function, you can retrieve information (BaseColor, Depth, Roughness, Metalic, etc.) that is written to the GBuffer, so you can adjust the texture when generating particles from objects in the world, for example.
In this article, I would like to explain this feature, focusing on the sample “1.4 Sample GBuffer Attributes” found in Niagara Advanced.
What is GBuffer?
Before we get into the explanation of the samples, a brief explanation of GBuffer is in order.
A GBuffer is an intermediate buffer created at the Base Pass of the rendering pipeline for later use in lighting and post-processing.
Various information such as normal, metallic, roughness, and depth information is written.

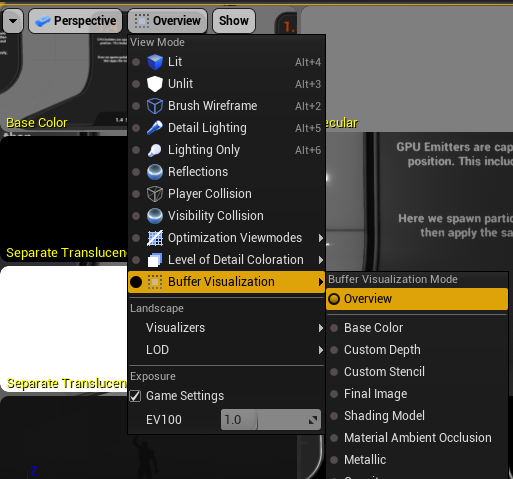
Click on the button at the top of the Editor screen, labeled Lit by default, and select Buffer Visualization > Overview to see a list of the current GBuffers.
Since what is written is the range that is visible to the camera, the values that can be retrieved from Niagara with this function are limited to what is visible to the camera at the time.
Breakdown of ‘1.4 Samples of GBuffer attributes’

In this sample, the material is assigned to Graiman with different colors for different areas and different kind of surface for the right and left halves of the body.
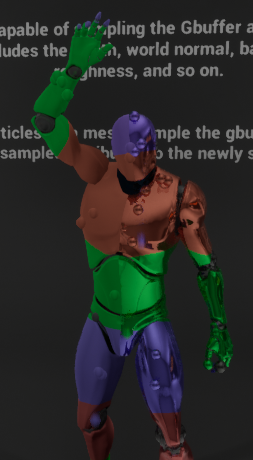
Niagara makes a Particle appear from the surface of this Graiman, and in doing so, it reads the GBuffer and matches the color and texture to the color and texture of the surface it appears on.
Let’s look specifically at what’s inside.
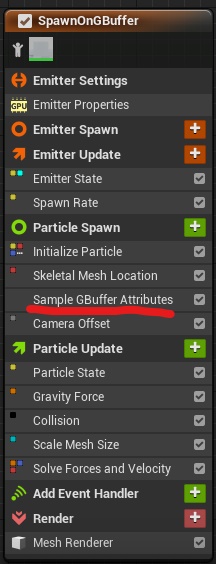
The only place to look is at Sample GBuffer Attributes, which is a renamed Scratch Pad module.
The others are just functionalities to make particles spawn on the surface of the Mesh with Skeletal Mesh Location, fall under gravity, and collide with the floor.
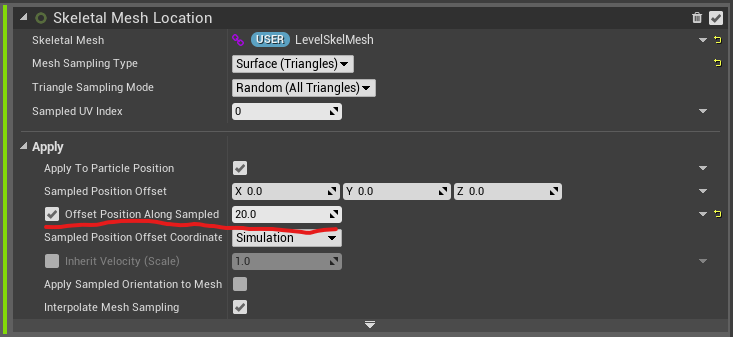
When the Particle is brought out from the surface of the Mesh, a small Offset is added in the Normal direction. This is for the purpose of making it easier to understand the depth comparison demo that will appear later, so it is not necessary.
Now, let’s look at the inside of Sample GBuffer Attributes.
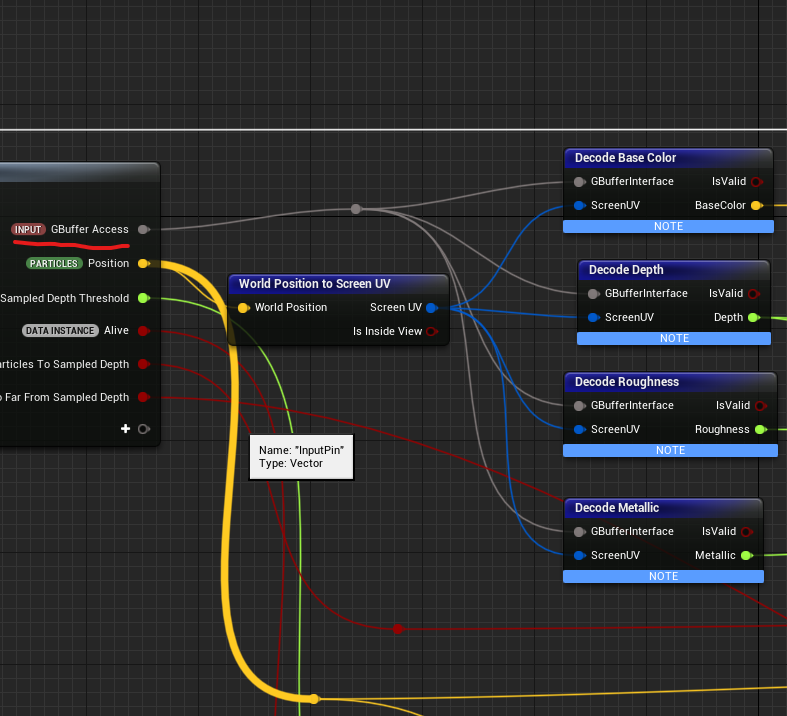
First, we are getting the GBuffer value.
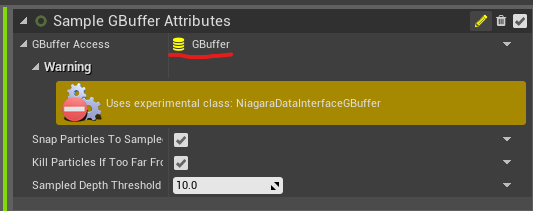
The input for GBuffer Access is a data type called GBuffer. (It’s still Experimental though)
You can convert from Particle’s world position to screen UV and get any value of GBuffer with Decode ○○.
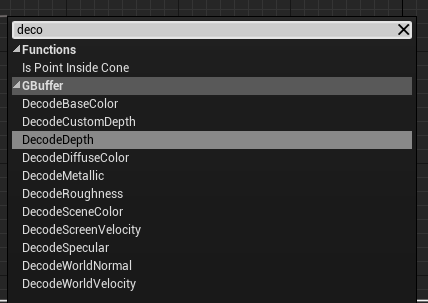
So far, the values that can be obtained seem to be the above.
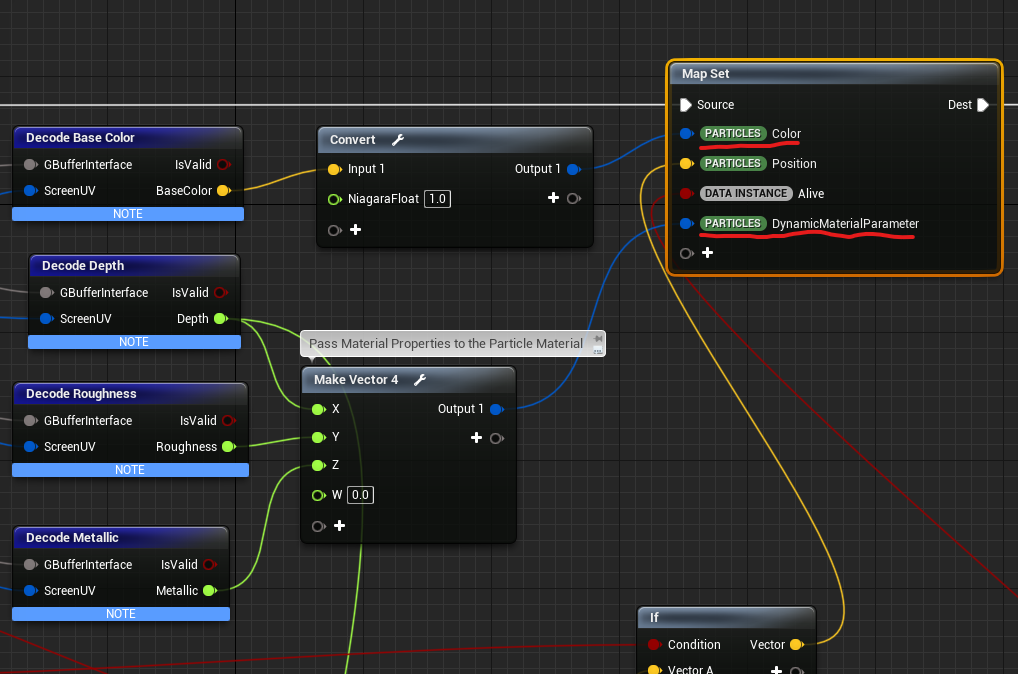
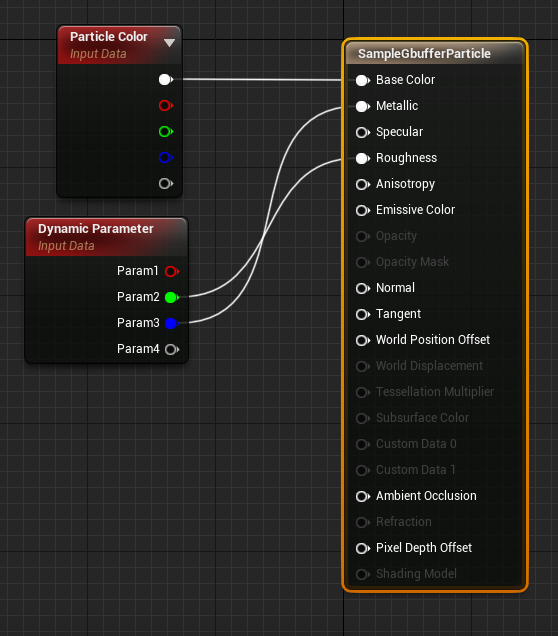
The obtained values are then put into Color and Dynamic Parameter. Here, BaseColor, Roughness, and Metalic are passed to the material to create the color and texture.
In the material, It’s just displaying the received values as they are.
Finally, in this sample, HLSL is written to compare the actual position with the position in world space calculated based on the SceneDepth obtained from the GBuffer. Then, the process of adjusting the position to the SceneDepth or killing particles, if there is too much difference, is included.
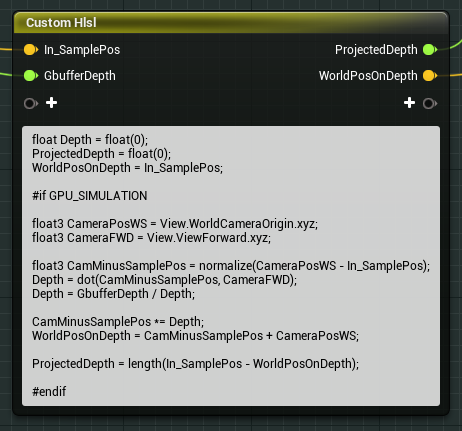
Where In_SamplePos is the actual Particle position and GbufferDepth is the SceneDepth obtained from the GBuffer.
From the camera position and orientation, the position in world space based on SceneDepth is calculated and finally entered into WorldPosOnDepth. The difference from the actual position is then output as ProjectedDepth.
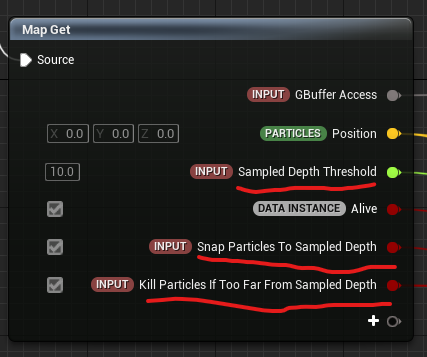
Then, if the ProjectedDepth value is greater than the Sampled Depth Threshold of the input value, it means that the discrepancy between the actual position and the position by SceneDepth is greater than the threshold value, and the two flags below the input value can be turned on or off to adjust or kill the particle’s position adjusting or killing them.
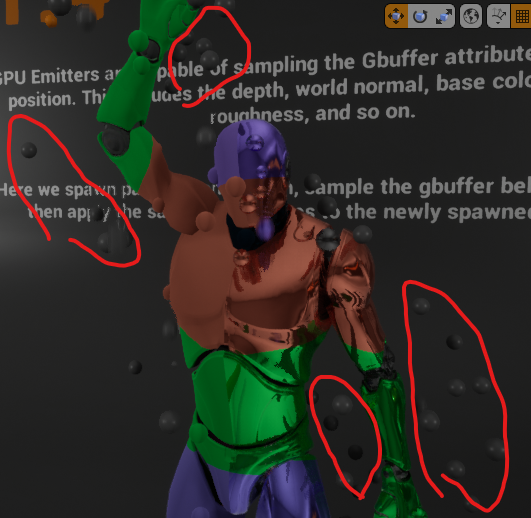
If the setting is set to not kill the large misalignment and not adjust the position, you can see that the particles are still sampling the back wall instead of the gray man, as shown here.
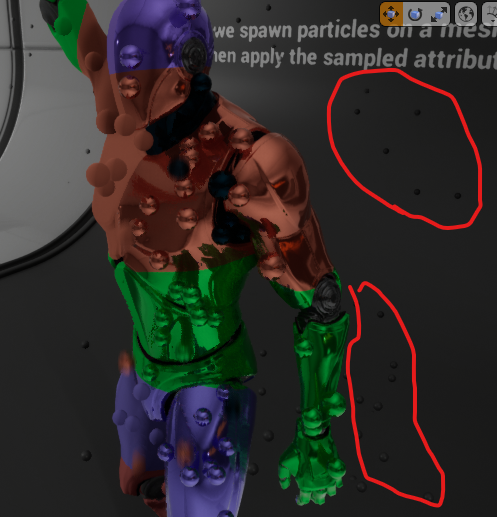
If the setting is set to adjust toward SceneDepth, the particles sampling the back wall are adjusted in position and stick to the back wall.
As you can see, GBuffer’s sampling is based solely on screen UVs, so it is possible that it may sample areas other than where you want it. This is a good reference for how to adjust in that case. (Incidentally, the reason why particles appear so far outside of the mesh is because the particles are slightly offset in Skeltal Mesh Location as I explained above.)
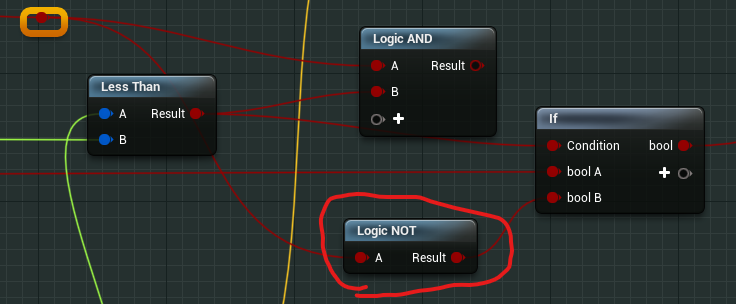
Also, there is a mistake in the Kill Particles If Too Far From Sampled Depth flag, so it should work properly if you fix it as follows.(It’s happening at least in UE4.26, not sure UE5)
Conclusion
This is the explanation of Sample GBuffer Attibutes. It is still an Experimental feature, so you need to be careful when using it, but I think it can be used to express various interesting things.
In this sample, the default is to kill particles sampled outside of the Graiman, but I feel that it is possible to do the opposite and, for example, place particles appropriately on the box and then make them stick to the background Mesh and others based on SceneDepth.
It would be interesting to be able to express using other values of GBuffer, or to modify the engine and use any value you like in GBuffer.
I hope to do those in the future as well.
Update: April 10, 2021
I created a sample effect utilizing this sample GBuffer function as shown below.
It’s reading WorldNormal to make particles crawl on meshes in the screen.


