Introduction.
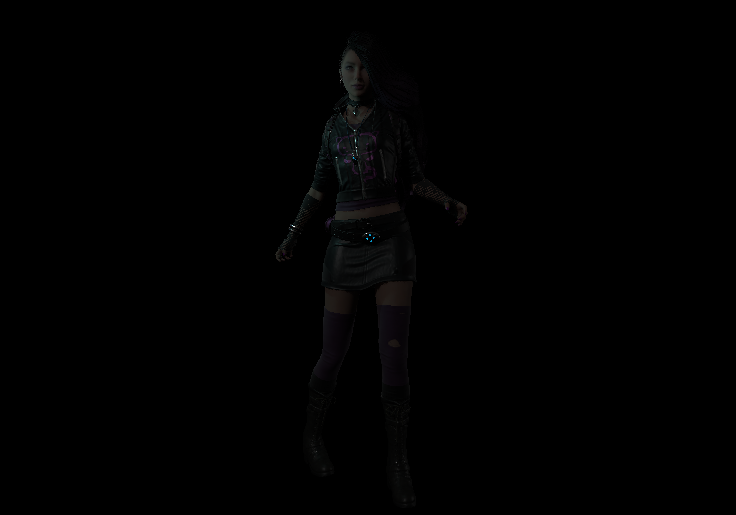
The quality of the CG in DeathStranding is very impressive.
As a VFX artist, I like various holograms in the game. This time, I would like to reproduce the hologram before the connection of chiral communication in UE!
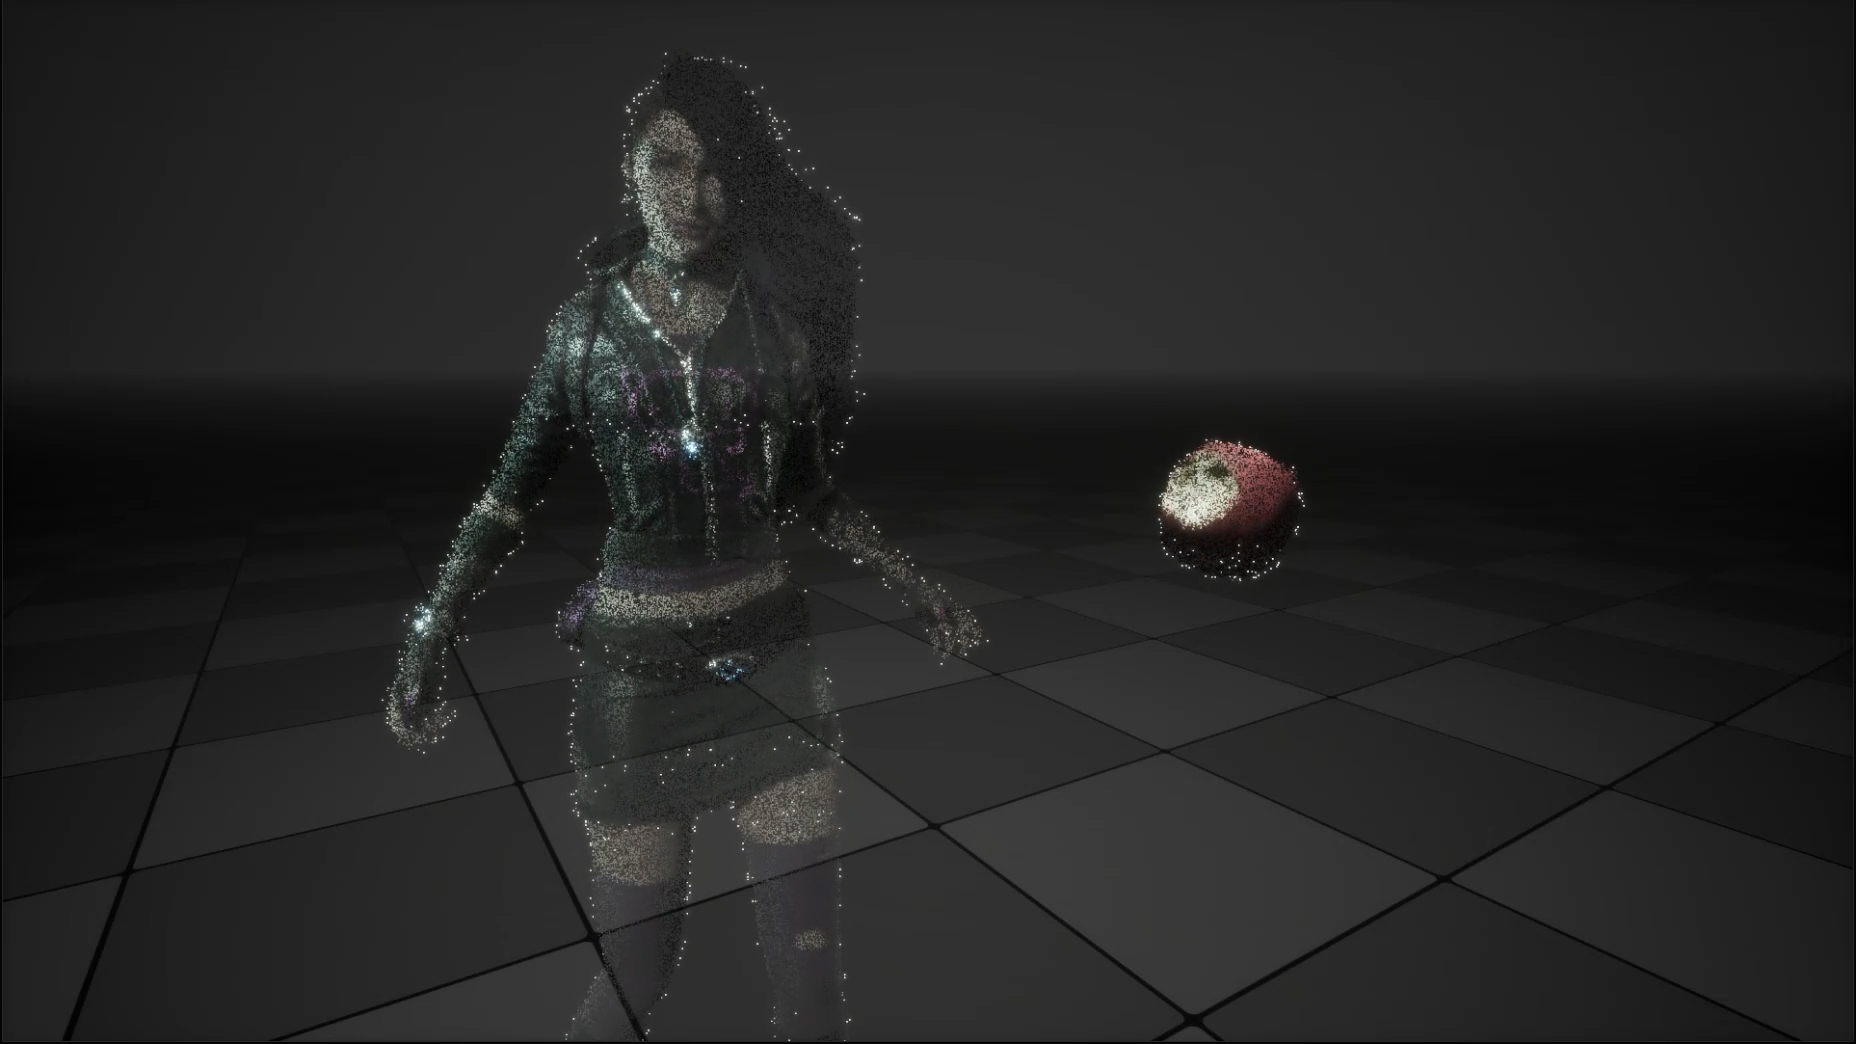
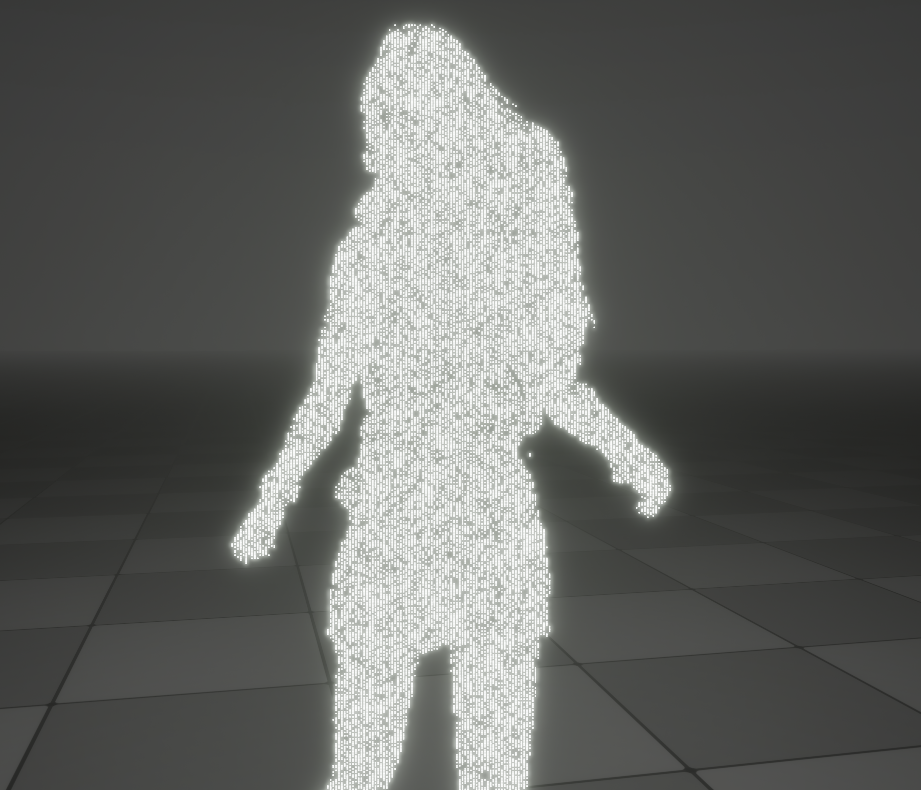
And here is what I created.
I think I was able to reproduce it reasonably well!
It can work on both any SkeletalMesh and any StaticMesh with a little tweaking parameter.
The data is available below, if you are interested!
https://heyyohanashima.gumroad.com/l/kntcdg
Explanation.
The hologram is made up of the following four elements, as well as appearance/disappearance, and I would like to explain the creation of elements ① and ②.
Appearance/Disappearance
Summary
When I first tried to reproduce this hologram, I did this and that in Shader.
However, even though I tried many things, I could not express the noise-like feeling that looks random and slightly aligned, and seems to be falling down a bit, so I changed my mind and tried Particle, which turned out to be a good result.
So this hologram representation is made in Niagara. The reflection of the original color of the character is implemented using SceneCapture, and the outline is implemented using CustomStencil.
The basic mechanism is the same as described in the previous article on particle generation in Screen Space. Particles are placed according to the bounding box of the target mesh, and unnecessary particles are clipped off by masking with CustomStencil.
Mesh Setup
Since it is the same for both StaticMesh and SkeletalMesh, we will use SkeletalMesh for this explanation.
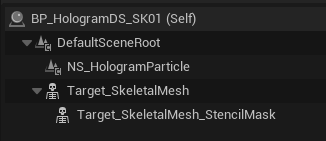
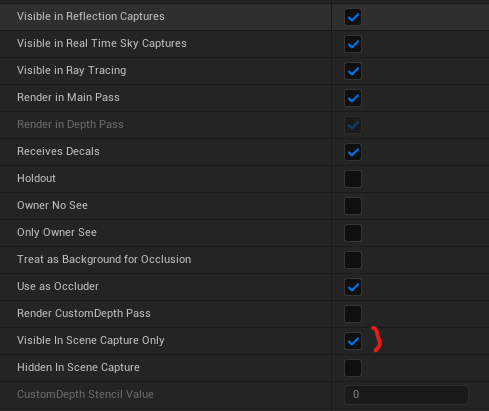
Target_SkeletalMesh is the original mesh, which we will SceneCapture to get the colors. We do not want it to appear in the actual scene, so we check the Visible in Scene Capture Only checkbox.
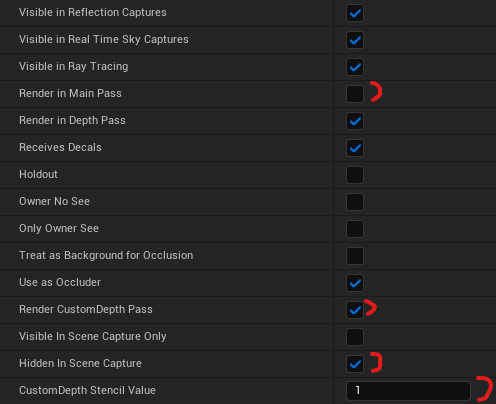
Put the same SkeletalMesh into a child of Target_SkeletalMesh. This is written to the CustomStencil’s Buffer, which will be used as a mask for the entire hologram, including the outline. Conversely, we do not want it to appear in the actual scene or SceneCapture either, so turn off Render in Main Pass and check Hidden In Scene Capture.
Then turn on Render Custom Depth Pass and put any value in CustomDepth Stencil Value. This value should be set to the same value in the process of erasing the Particle with the CustomStecil value in Niagara.
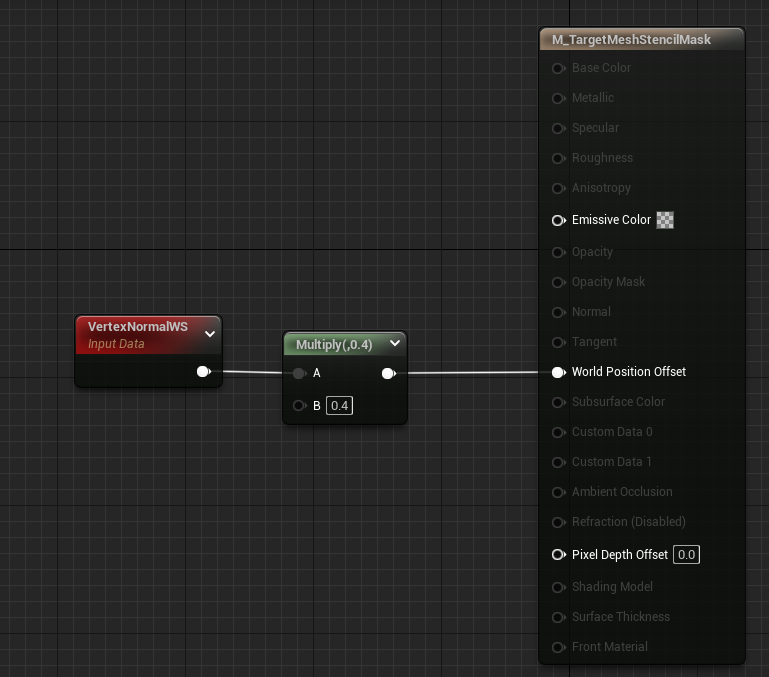
The Material to be assigned to Target_SkeletalMesh_StencilMask can be anything since it is simply written to CustomStencil, but for the purpose of outlining, a slight normal bulge is added to the Material.
This completes the Mesh setup.
Setting up SceneCpature
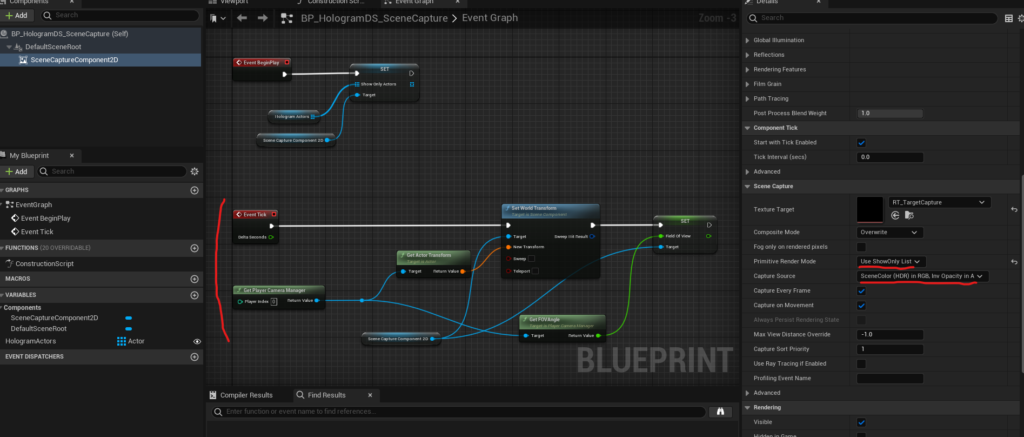
Set the Primitive Render Mode in SceneCapture to Use ShowOnly List, set the Actors set up above as Show Only Actors, and set Capture Source to SceneColor (HDR) in RGB, InvOpacity in A.
Then, in every frame, the scene capture camera has to be in the same position, rotation, and FOV as the camera that is projecting the scene.
Now you can get the color and mask of the original Mesh of the hologram in Texture as the Render Target, which is then used in Niagara.
Also, note that the resolution ratio of the Render Target must match the resolution ratio of the screen at the time of play.
Niagara Implementation

The left side texture can be obtained from SceneCapture, and the right side mask can be obtained from Custom Stencil’s Buffer. In Niagara, we will use these to create the main part of the Particle and the outline.
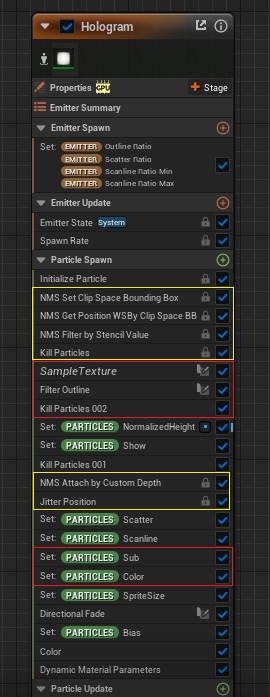
This is the process up to Particle Spawn of the Niagara System of this hologram. All four elements of the hologram described above are implemented using only one Emitter.
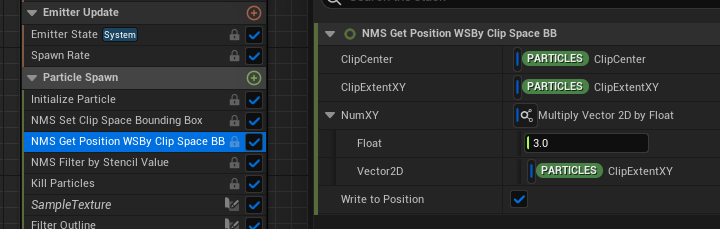
As for the area circled in yellow, the mechanism is the same as in the article listed above, so I will skip the explanation, but by adjusting the NumXY parameter and the Jitter Position parameter in a good way, we can create the feeling of noise with a slight sense of alignment.
The implementation of the main and outline sections is handled in the area circled in red.
After the first yellow circled process, only the Particle overlapping the Mesh remains based on the CustomStencil mask like bellow.
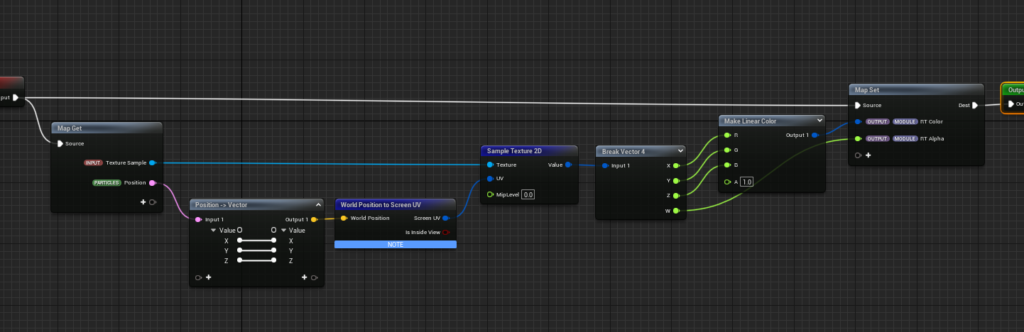
From here, the main and outline portions are created. Since we need the color information of the original mesh and the mask information of the outline, SampleTexture is used to obtain this information.
SampleTexture, as the name suggests, samples RGBA from the RenderTexture being baked in SceneCapture and stores RGB in the parameter RT Color and A in RT Alpha.
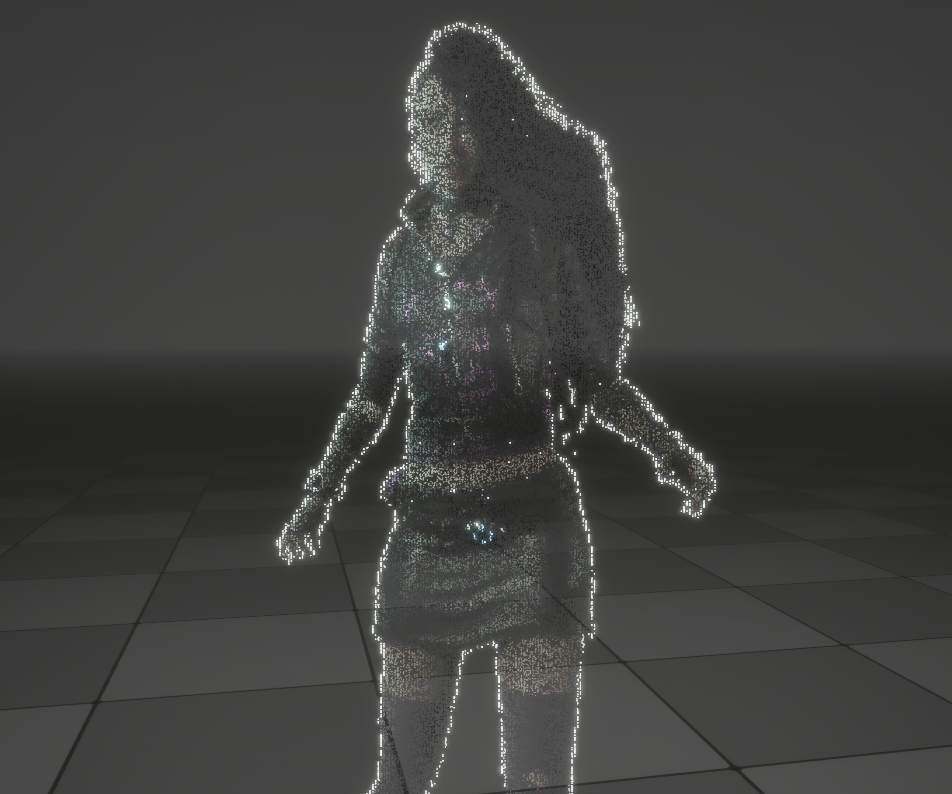
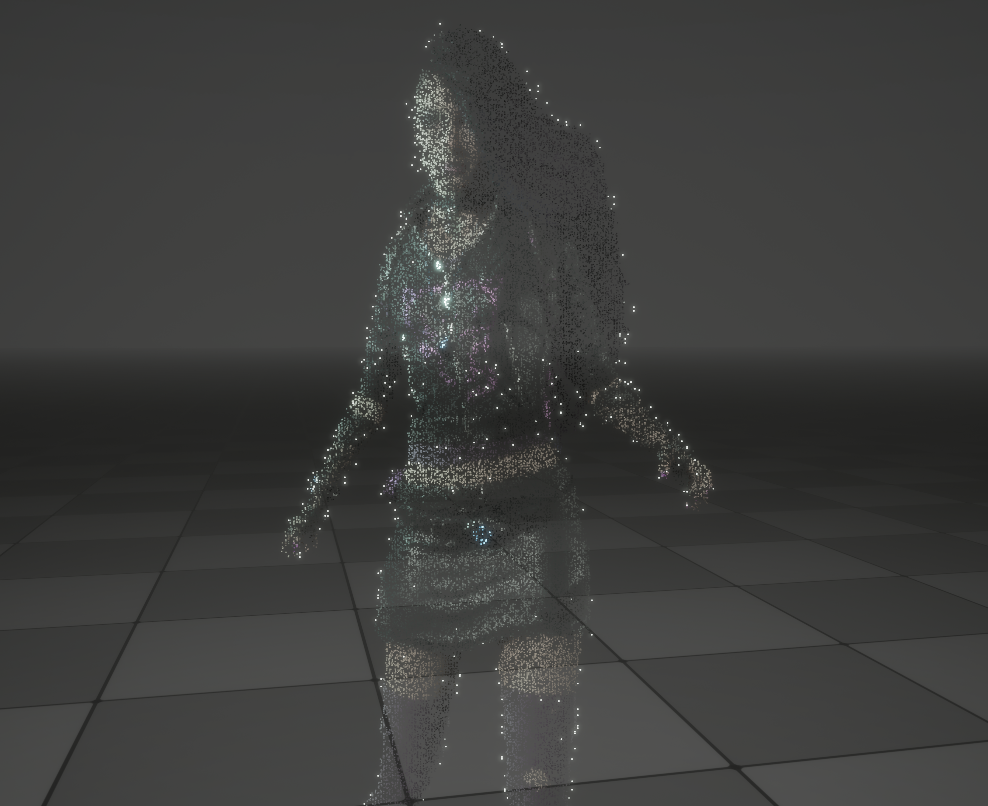
If we add color to Particles using the obtained color information (i.e., make the color of Particles without color information white), the outline will appear, but as shown on the left side below, the number of Particles will be quite large, so the process of thinning them out is done in Filter Outline and then in KillParticles.
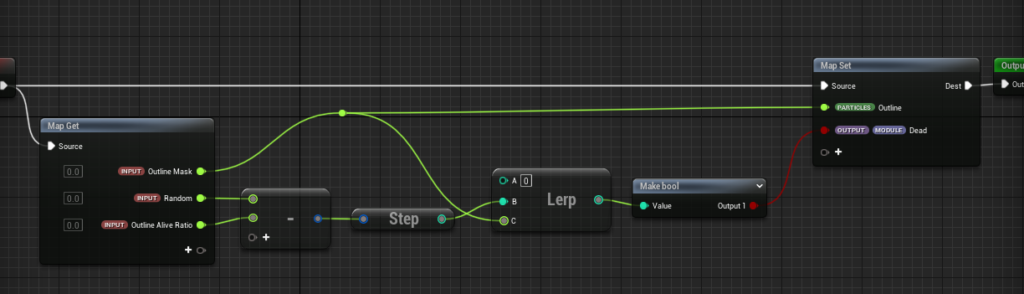
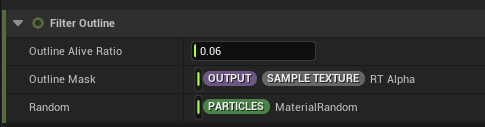
The Filter Outline process kills particles with a value higher than the value of the Outline Alive Ratio for a random value for each Particle (if 0.06 is set, 6% of the particles will survive). The RT Alpha obtained from Sample Texture can be used as a mask for the outline of the mesh (because the SceneCpature is set to Inv Opacity in A).
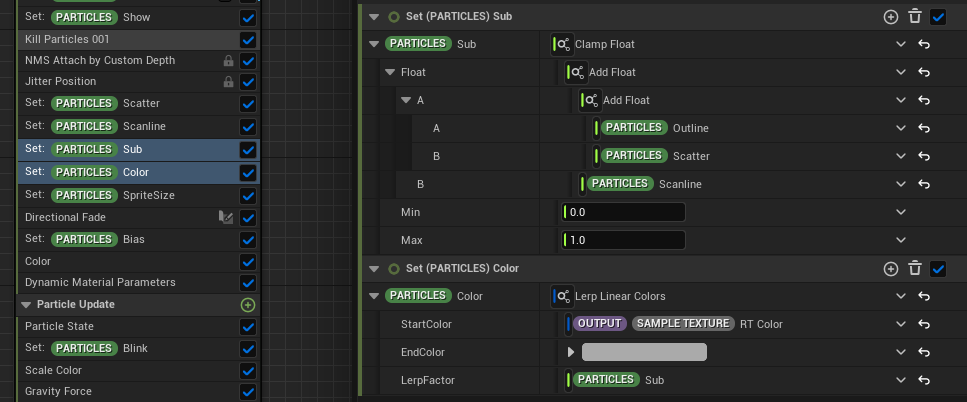
Now that the outlines have been thinned out, the only thing left to do is to color the main and outline parts. I just set it to RT Color or Grey Color depending on whether the particle is outline or not. (Actually, the scanline and scatter are also set to the same color as the outline, so attributes are created for each, and the implementation is to set RT Color for all but those.)
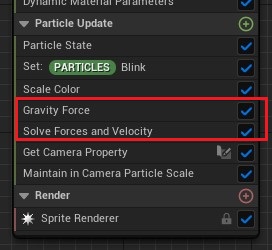
Lastly, to give the impression that the noise is moving slightly downward, apply a weak Gravity Force and let it drop down. The Particle life is set to 0.15~0.25 seconds, so it gives a sense of noise by appearing, moving down slightly, and disappearing.
This concludes the explanation of the implementation of the main and outline!
Conclusion.
For VFX artists, holograms have always been a fascinating subject.
In most cases, holograms are expressed by doing this and that with Shaders, but this time, by expressing holograms with Particles, I am able to create a noisy atmosphere that feels like a poor signal, which I think broadened the range of expression!
Please take a peek at the data below, which includes all the scanlines, scatters, and appearance/disappearance implementations that I did not explain here, as well as holograms for both SkeletalMesh and StaticMesh!
https://heyyohanashima.gumroad.com/l/kntcdg
Next, I hope to be able to try hologram representation after chiral communication is recovered!


