
Introduction
If an object is placed in the level, it’s easy to spawn particles from a Static Mesh by using the Static Mesh Location module.
However, there are many cases where you want to spawn sparks or particles along a Static Mesh that is controlled entirely inside Niagara—such as slashes or helices. In those cases, you can manually adjust the particle positions so they look roughly correct, but that approach requires readjustment every time you change the slash direction or scale.
For complex meshes like helices, manual adjustment quickly becomes impractical.
Niagaraで出してるMeshからParticleを出す
— HeyYo (@yo_hanashima) December 13, 2025
SlashとかHelixなどで便利で、
大きさや位置、回転が変わっても自動で追従
Particleが出るMesh上の範囲をアニメーションできるようにもしていきます!
今度のUEアドベントカレンダーで紹介します~#UE5 #Niagara pic.twitter.com/uyQ1ocTZYY
The method introduced in this article allows particles to automatically spawn from the mesh, even if the mesh’s position or scale changes.
Additionally, as shown in the video above, I’ll also explain:
- How to give particles velocity aligned with the mesh orientation
- How to use the source mesh’s UVs to spawn particles only from specific areas of a slash or helix
A Quick Announcement
Before getting into the explanation, let me briefly promote something.
I’ve released a course on Coloso that dives deep into using Niagara and Materials to create advanced VFX expressions.
Rather than just building examples, the course explains the underlying theory and mechanisms, with the goal of helping you internalize knowledge that can be broadly applied.
If you’re interested, please check it out!
Mastering the Mechanics of Advanced Niagara & Material VFX
Hi all!
— HeyYo (@yo_hanashima) December 12, 2025
The Eng Sub version of my class "Mastering the Mechanics of Advanced Niagara & Material VFX" will be up for pre-order on Coloso(@colosoglobal) soon!
Use the link below for a $55 coupon! (Valid for 48 hours)
Link: https://t.co/WonHmK4SSJ pic.twitter.com/BuAYcu8cBQ
Environment
UE5.5.4
Overall Workflow
- Use Static Mesh Location to spawn particles from the target Static Mesh
- Use Particle Attribute Reader to retrieve position, scale, and rotation data from the mesh particle
- Adjust particle spawn positions using the retrieved data
- Emit particles along the shape of the source mesh
- Filter particle spawn locations using the source mesh’s UVs
We’ll go through these steps using a simple example.
Practice
0. Preparation
First, create an emitter that spawns a single mesh.
We’ll use a mesh commonly used for slash effects.
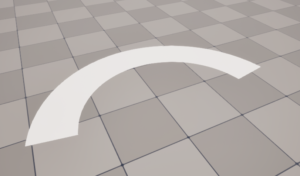
Simply set this mesh in a Mesh Renderer, and spawn one particle using Spawn Burst Instantaneous.
Name this emitter Mesh.

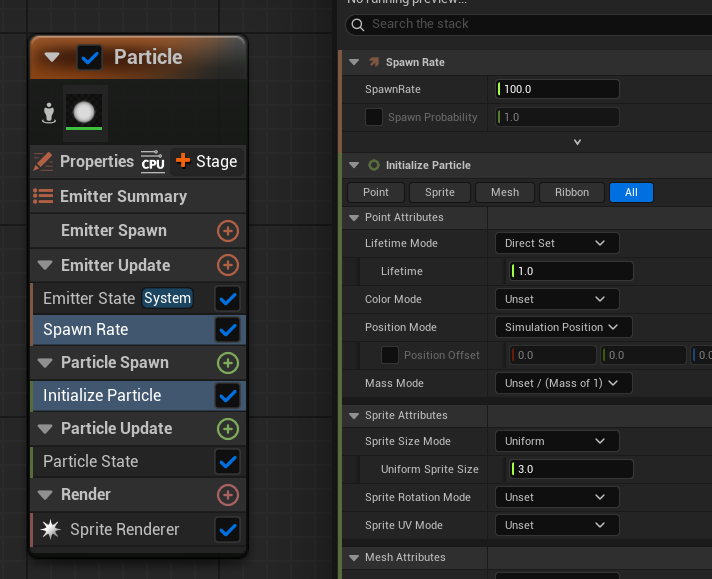
Next, create another emitter for the particles spawned from the mesh.
Add it using Add Minimal Emitter, set:
- Spawn Rate: 100
- Sprite Size: 3
Name this emitter Particle.
That completes the setup.
1. Spawning Particles with Static Mesh Location
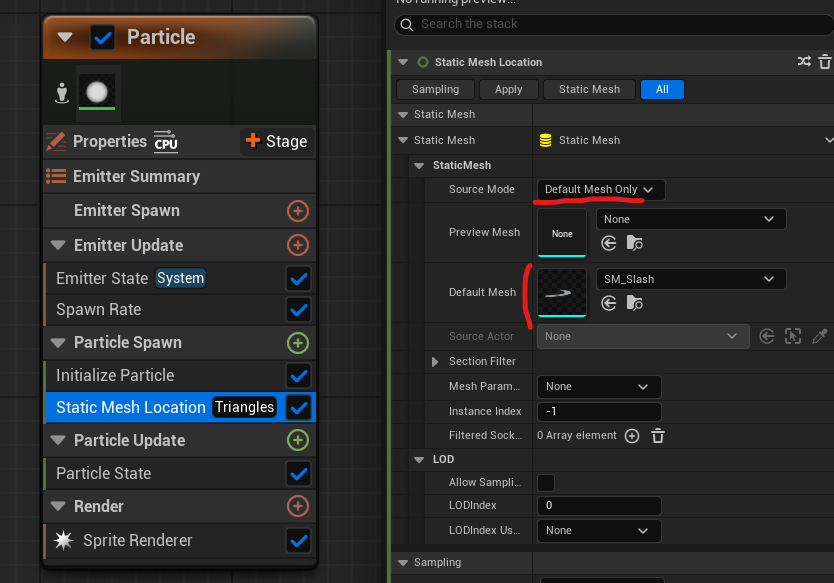
In the Particle emitter, add Static Mesh Location, and set the Default Mesh to the slash mesh spawned by the Mesh emitter.
Since the source mesh will not change in this case, set Source Mode to Default Mesh Only.
If left at the default setting, attaching this Niagara System to another Static Mesh would cause the particle source mesh to change to the parent mesh—this prevents that.
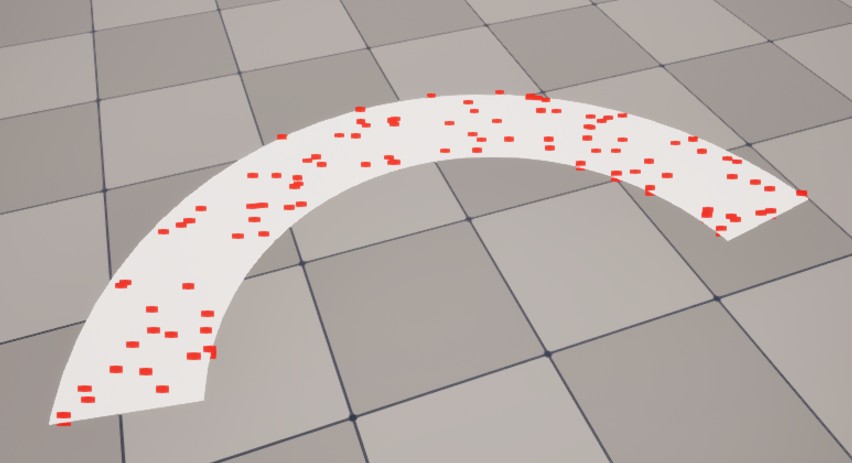
For clarity, set the particle material to a simple Unlit Translucent material that only reflects Particle Color, and set the color to red.
Now particles will randomly spawn across the surface of the slash mesh.
However, if you modify the mesh particle’s scale, position, or rotation, the particles spawned via Static Mesh Location will still be based on the default mesh transform—causing visible offsets.
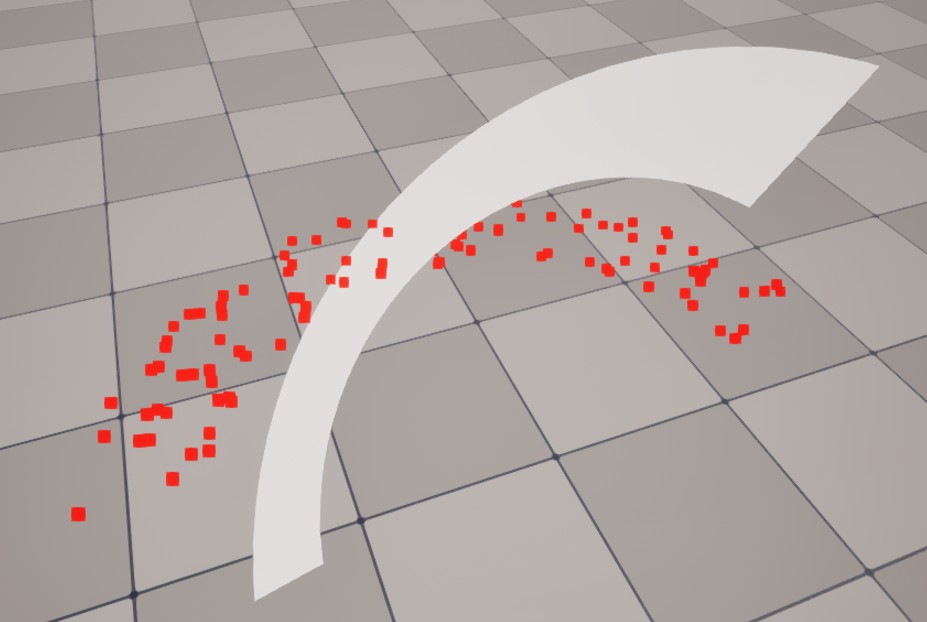
Our goal is to make particle spawn positions automatically follow changes in the mesh particle’s scale, position, and rotation.
2. Retrieving Mesh Position, Scale, and Rotation with Particle Attribute Reader
To access particle data controlled by another emitter, we use Particle Attribute Reader.
This was covered in a previous article, so if you’re unfamiliar with it, please read this first:
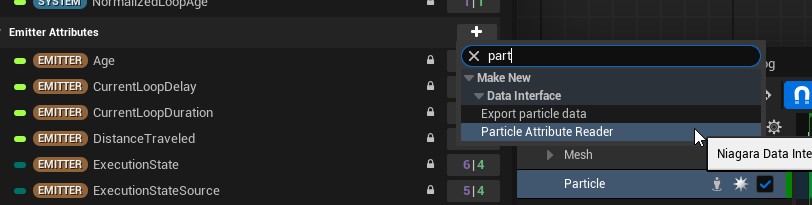
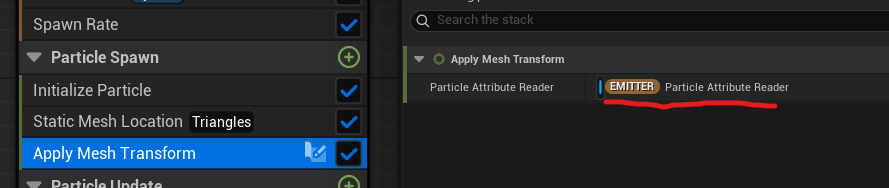
First, create a Particle Attribute Reader as an Emitter Attribute.
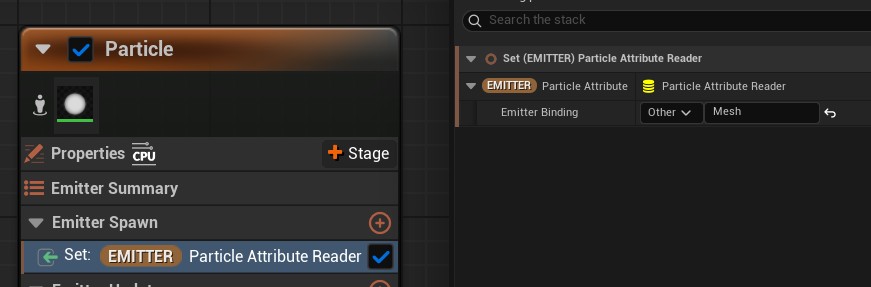
Add it to Emitter Spawn, and set Emitter Binding to the name of the emitter you want to read from—in this case, Mesh.
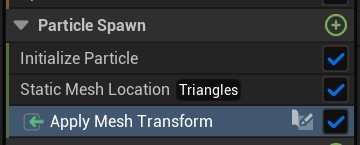
Next, create a Scratch Pad Module in Particle Spawn and name it ApplyMeshTransform.
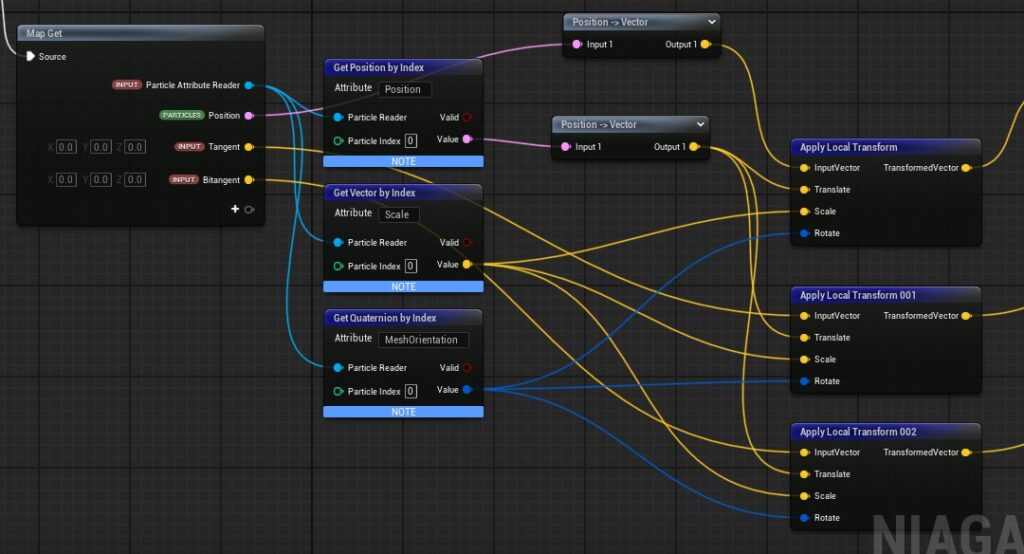
Inside this module, we’ll retrieve the mesh’s position, scale, and rotation, and apply them to the particle position.
Add Particle Attribute Reader input to Map Get node.
We want the following attributes:
- Position:
Position(Position type) - Scale:
Scale(Vector3 type) - Rotation:
MeshOrientation(Quaternion type)
For each, add a corresponding Get <Type> by Index node and set the Attribute name accordingly.
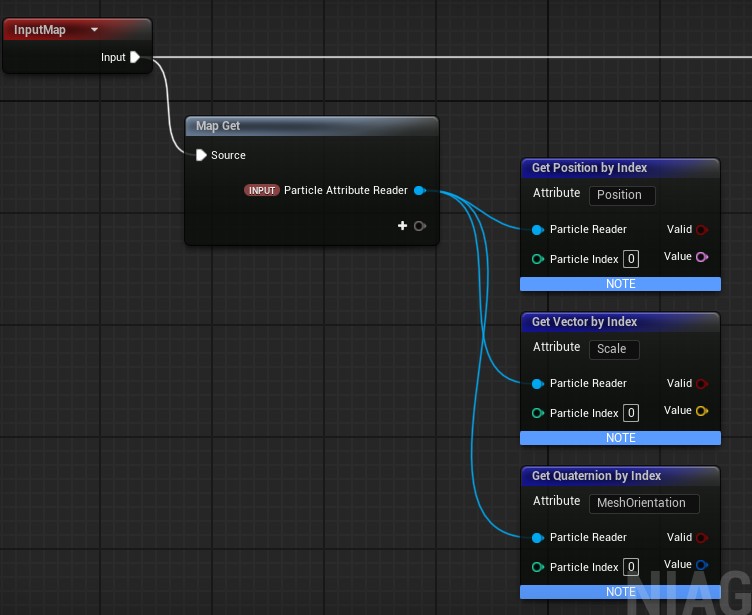
Since the mesh emitter spawns only one particle via Spawn Burst Instantaneous, its Particle Index is 0.
The Particle Index corresponds to the Execution Index, which is assigned sequentially starting from 0.
Because only one mesh particle exists, its Execution Index is 0.
With this, we can retrieve the mesh’s position, scale, and rotation.
3. Adjusting Particle Spawn Position Using Retrieved Data
Position, scale, and rotation together are commonly referred to as a Transform.
You’ll recognize this from the Transform values shown in the Details panel when selecting an object in the level.

To apply this transform to particle positions, we use Apply Local Transform.

- Connect the original particle position to InputVector
- Set:
- Position → Translate
- Scale → Scale
- MeshOrientation → Rotate
This transforms the particle position by applying the mesh transform.
For InputVector, use the particle’s original Position (via Map Get).
Although a conversion node from Position to Vector is created automatically, this is just for large-world support and can be ignored here.

Finally, use Map Set to write the output back to Position.
Don’t forget to assign the Particle Attribute Reader input in the Scratch Pad Module.
At this point, there are two important considerations.
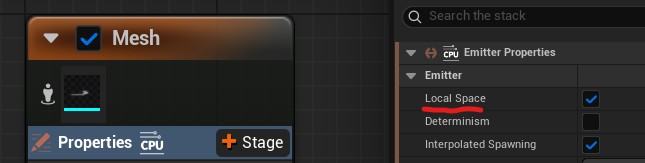
Note ①: Use Local Space
Because scale and rotation depend heavily on the pivot position, both the mesh and particle emitters must use Local Space, with the Niagara System’s position as the pivot.
Enable Local Space in the Emitter Properties for both emitters.
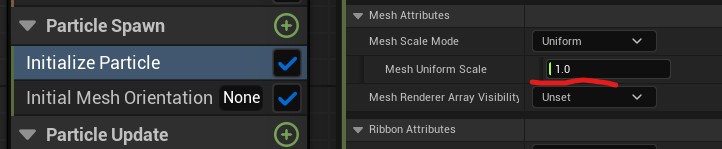
Note ②: Set the Scale Properly
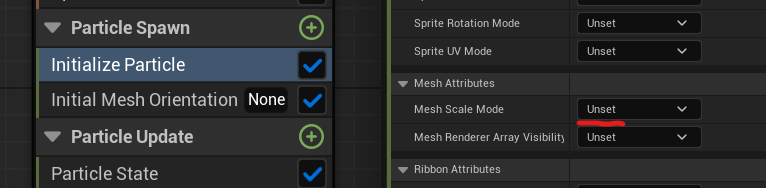
Even if the mesh particle’s Mesh Scale Mode is set to Unset, the mesh still appears at scale 1 visually—but the Particle Attribute Reader will not retrieve the correct scale value.
Make sure the scale is explicitly set.
Once configured, particles will correctly spawn on the mesh surface even when its position, scale, or rotation changes.

This completes the base setup for spawning particles from a Static Mesh generated in Niagara.
4. Emitting Particles Along the Mesh Shape
Now let’s look at some practical extensions.
First, emitting particles along the shape of the mesh.
For slash effects, you may want particles to fly opposite the motion trail or in the direction of the slash. This method is ideal for that.
Using the UV direction of the mesh works well here.
In the slash example above, it applies velocity along the two directions:
- Red direction = V direction
- Blue direction = U direction
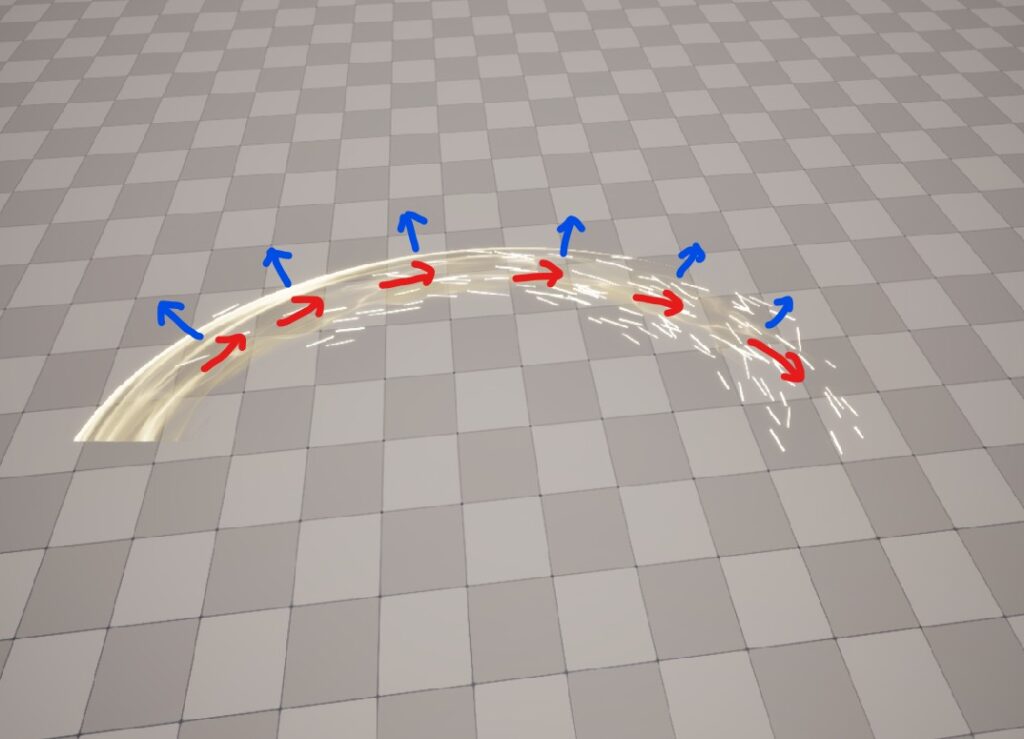
Let’s implement this step by step.
First, display a UV checker on the mesh.
The red arrow indicates the V direction, and the blue arrow indicates the U direction.
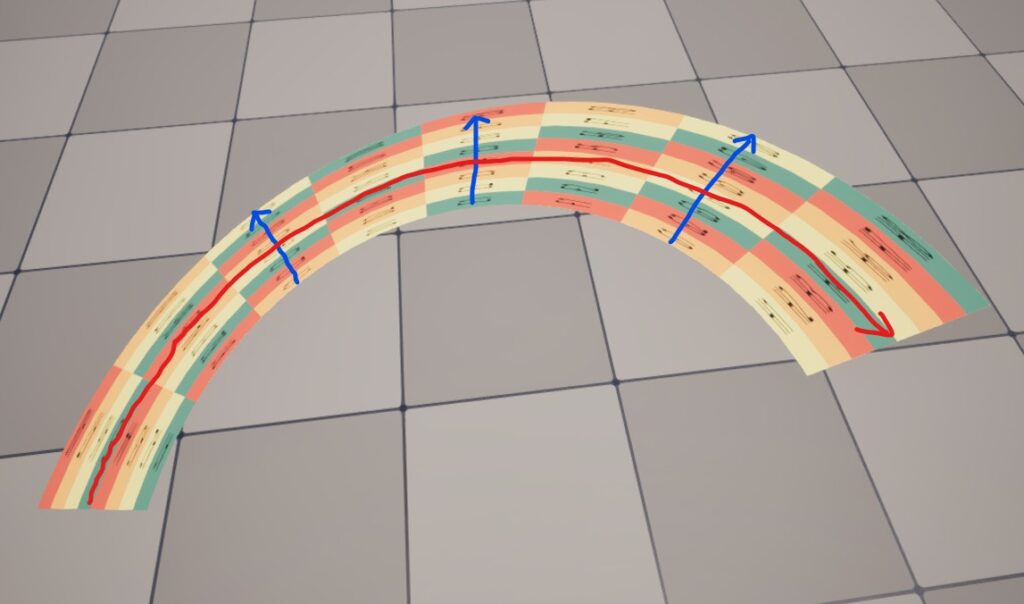
You might wonder how to retrieve UV directions—but Static Mesh Location already provides them.
When using Static Mesh Location, the following attributes are automatically generated:
SampledTangent→ U directionSampledBitangent→ V direction
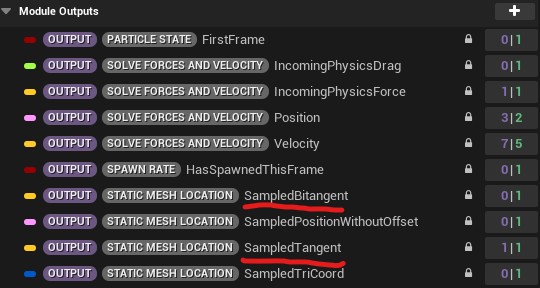
When the emitter is in Local Space, these vectors represent the mesh’s UV directions in local space.
However, just like Position, these vectors must also be transformed using the mesh particle’s transform. So we’ll handle this inside ApplyMeshTransform.
Add Tangent and Bitangent vector inputs to Map Get, and apply Apply Local Transform to them just like Position.
Store the outputs in new particle attributes:
MeshTangentMeshBitangent

To convert a Local attribute into a Particle attribute, connect it in Map Set, then right-click and choose Change Namespace → Particle.

Set the Tangent and Bitangent inputs to:
SampledTangentSampledBitangent

Now we have UV directions that correctly follow the mesh’s transform.
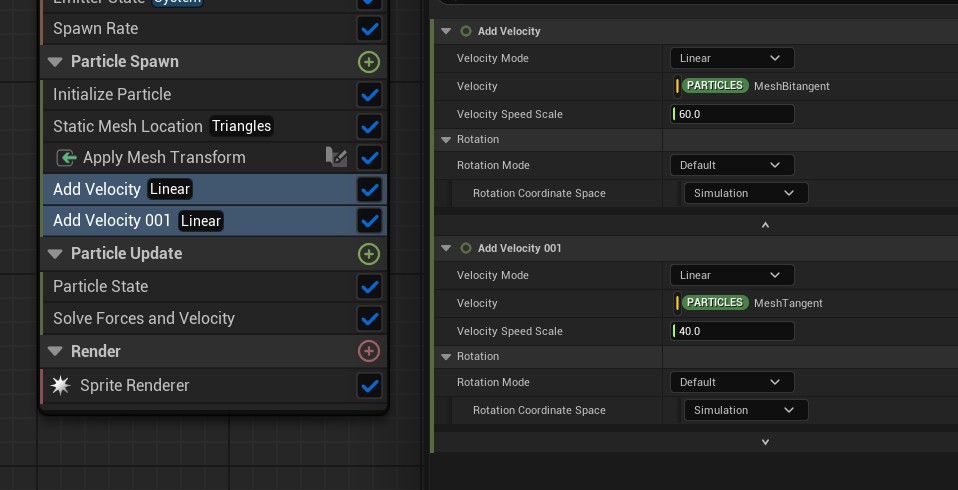
To use them as velocity:
- Add Add Velocity
- Set Velocity to
MeshTangent - Adjust Velocity Speed Scale
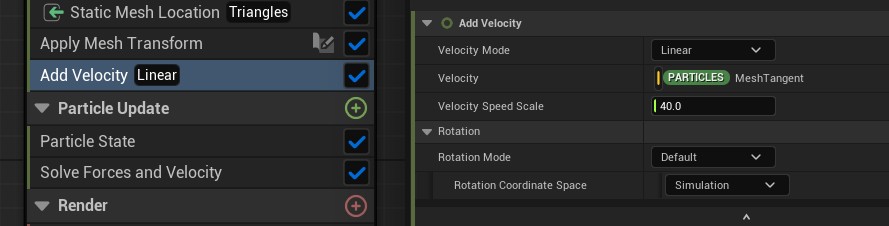
Particles will now fly along the mesh’s U direction.
Using MeshBitangent instead sends particles along the V direction.
By combining two Add Velocity modules and adjusting their speed scales, you can freely control particle motion along the mesh shape.
5. Filtering Particle Spawn Locations Using UVs
Next is another very practical technique: filtering particle spawn locations using the mesh’s UVs.
In slash effects, only part of the mesh usually represents the visible trail.
If particles spawn from the entire mesh, they will appear in invisible areas and look unnatural.
Rather than restricting spawn positions directly on the mesh (which requires special mesh setup), we instead:
- Spawn particles across the entire mesh
- Immediately kill particles whose UVs fall outside a specified range
This is a common technique, also used for particle dissolves.
Create another Scratch Pad Module and name it FilterByUV.
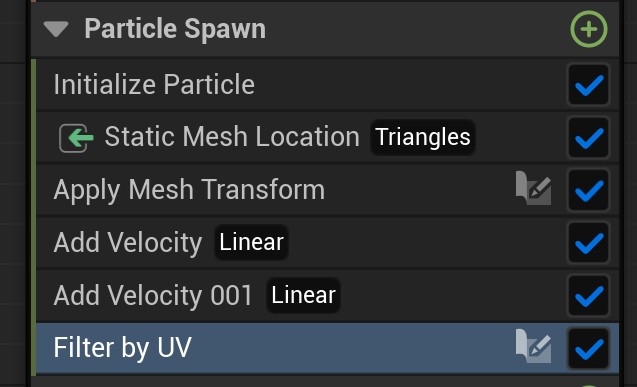
Since the slash flows along the V direction, we’ll filter using V (the same logic applies for U).
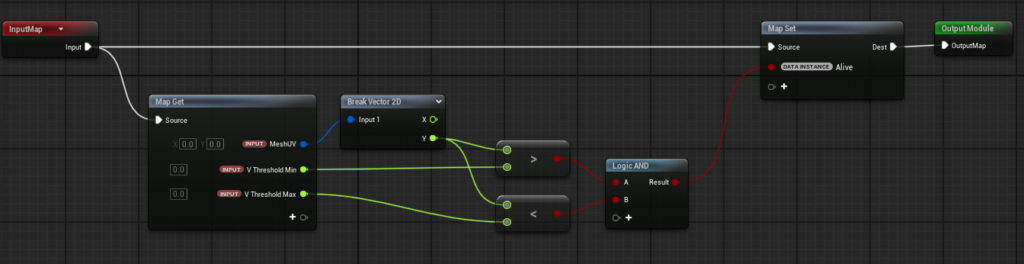
Inside the module:
- Add Map Get inputs:
MeshUV(Vector2)V Threshold Min(float)V Threshold Max(float)
Set up logic so that the particle’s Alive attribute is True only when:
V Threshold Min < MeshUV.y < V Threshold Max
If Alive becomes False, the particle is killed in that frame.
Set MeshUV to SampledUV, which is automatically provided by Static Mesh Location.

Animate V Threshold Min and V Threshold Max to match the slash motion.
In this example, the slash moves from V = 1 to V = 0, so both thresholds animate from 1 to 0, with Max slightly delayed to define a visible range.

Important note:
The Curve Index must use the slash’s normalized age. The default NormalizedAge refers to the particle’s own lifetime, which is not suitable here.
Since the slash lifetime matches the system lifetime (1 second), we use NormalizedLoopAge from the System attributes.
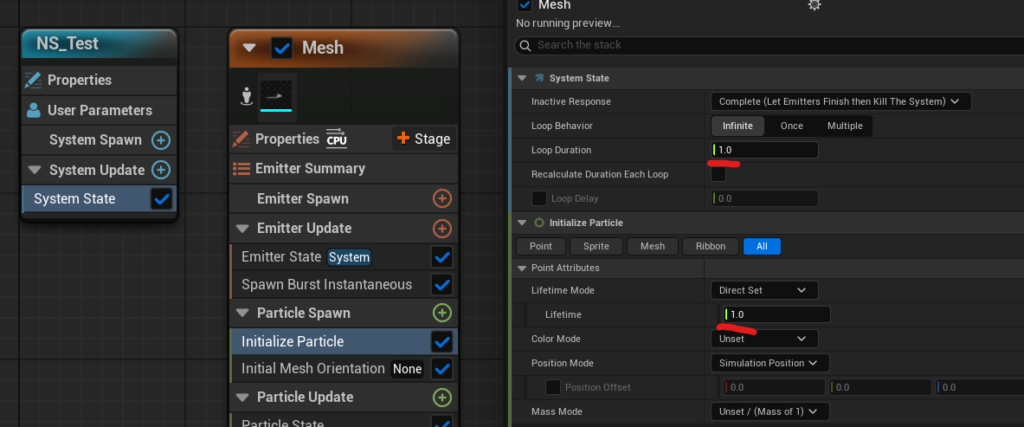
If lifetimes differ, you’ll need to adjust the curve timing or the CurveIndex value accordingly.
Finally, increase the Spawn Rate to 200 since many particles will be killed.
With this setup, particles spawn cleanly along the visible slash trail.
Conclusion
Spawning particles from Static Meshes generated in Niagara becomes extremely versatile when combined with these two additional techniques.
While this approach uses Scratch Pad Modules and slightly more advanced Niagara features, I hope you’ll find that it’s not as difficult as it might seem once you try it yourself.
If you’re interested in deeper explanations—such as more detailed breakdowns of tangents and underlying theory—those are covered extensively in my course:
Mastering the Mechanics of Advanced Niagara & Material VFX
Once again, my takeaway is the same as always:
Niagara is amazing—you can do so many things with it.
With that, Merry Christmas, and have a great CG life! 🎄✨


